Trojan Instructions Home
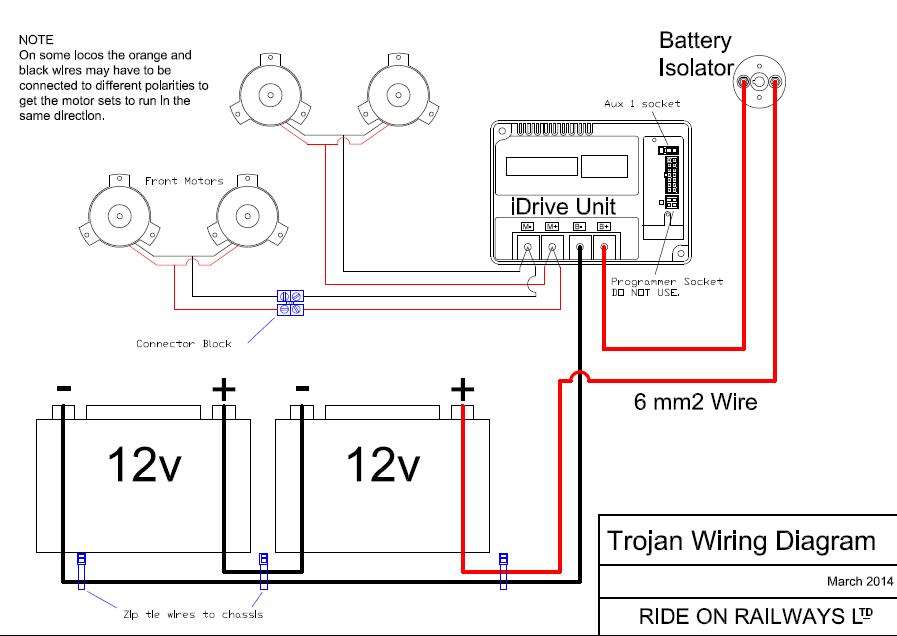
WIRING


DASHBOARD


August 2016

We have now moved the position of the mounting for the controller socket. This now means the body can be lifted off without having to unplug the handset.


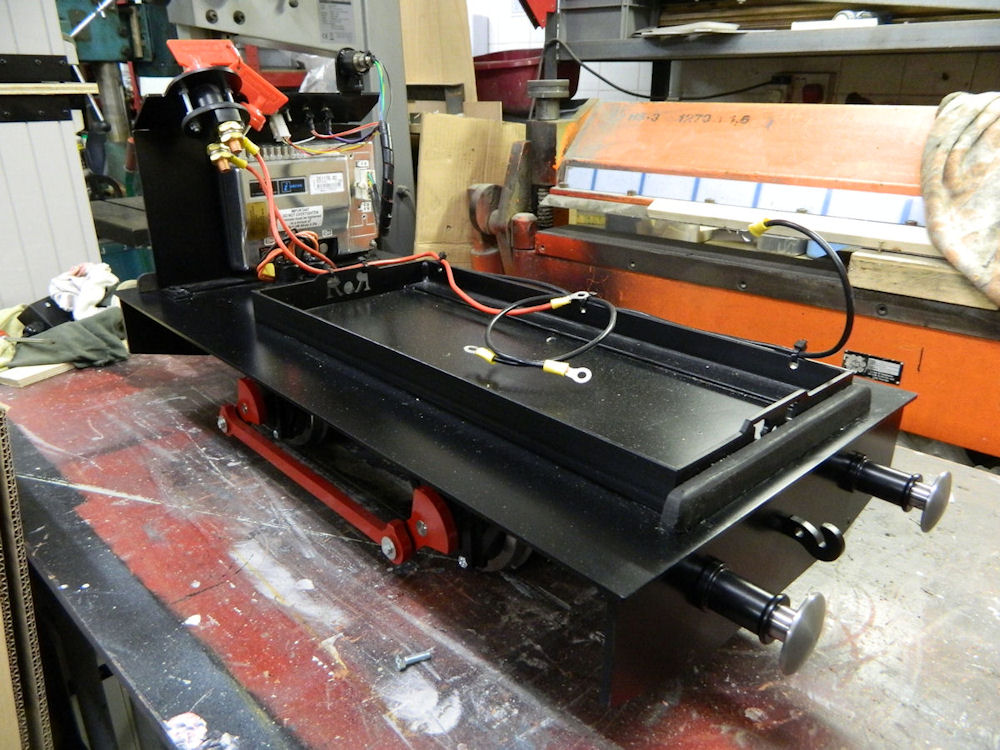
Mount the battery isolator switch on the dashboard.  Do this using 2 40mm  bolts and lock each bolton to the dashboard with a nut. Then use two more nut to set the switch at an appropriate depth fromt the dashboard. You may have to open up the main hole or sand down the collar of the battery switch to make it fit. The diameter of the switches seem to vary between each batch so it has been impossible to get the right sized hole.

Mount all the switches on the dashboard + the Truecharge meter.


Above - new socket as of summer 2014. Allows for inspection of pins. Cover with insulation tape once fitted.

We now use a chassis moutned 8 pin plug on the dashboard. Once mounted please tape up the exposed pins to avoid accidental shorting. To mount  undo the nut and push down the wires. Slide the wires through the slot in the mount and then locate the socket. Tighten nut to lock in poistion.


With all the switches in place put the iDrive under the dashboard and slide it up as high as you can. Mark the two mounting holes and drill with a 5mm drill bit. Mount the iDrive with the bolts going in from the back. Bolt the whole dash assembly to the deck.


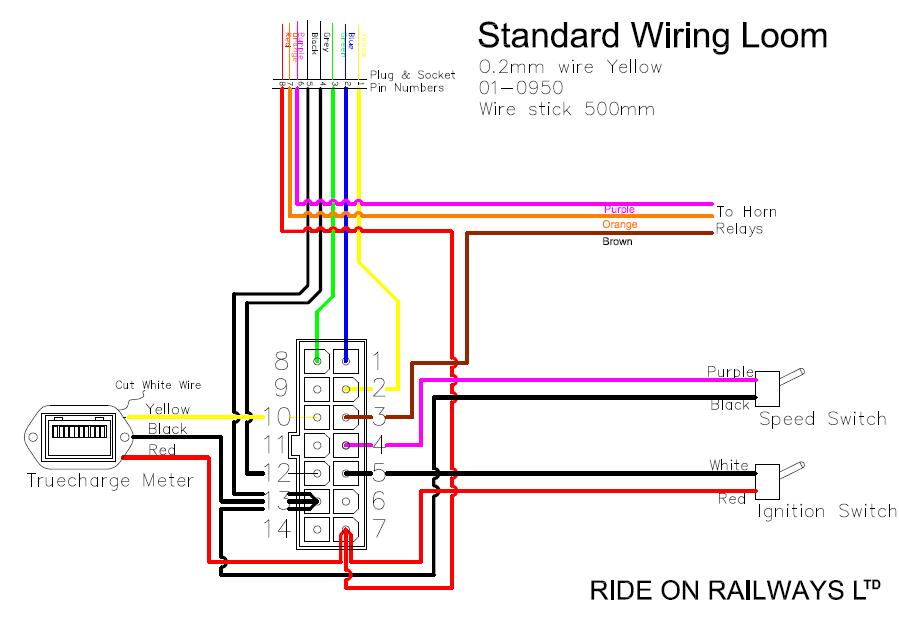
If you require a 24v dc low amperage supply splice in to the red wire and brown. This will provide up to 2 amp and  is protected with a self resetting fuse.

GOOD PRACTICE
·    Do not run power cables across battery tops
·    Keep battery and motor cables open and vented. Try not to wrap them in bundles.
·    4 motor engines use 6mm2 cable for battery and supply to pairs of motors.
·    Tie battery cables to chassis in a manner which means they cannot be connected to the wrong terminals.

12v Motors on 24v
    Motor manufacturers tend to design and use a  standard chassis and bearings for a whole range of different motors with varying rpm's. A motor stated as 12v 3300 rpm could be exactly the same as one labeled as 24v 6600 rpm. By running on 24v you reduce the current draw and work the motor more efficiently. If a loco is running at 6 mph then the motors will be running at 3300rpm and drawing half the current they would be if on 12v with the benefit of more speed and power available should you want to go faster.
    By over speeding the motors you also get through the more inefficient lower rpm's quicker when accelerating.


Copyright Ride on Railways Ltd